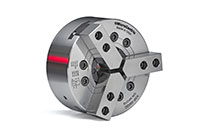
| Items |

KSF-08/QC
Precision Change KSF Power Chucks
|

KSF-10/QC
Precision Change KSF Power Chucks
|
|
Jaw System
|
N/A
Precision Change
|
|
Number of Jaws
|
N/A
3
|
|
Repeating Accuracy1
|
N/A
0.0001 in0.0025 mm
|
|
Chuck Diameter
|
N/A
8.25 in210 mm
|
N/A
10 in254 mm
|
|
Through Hole
|
N/A
2.598 in66 mm
|
N/A
3.228 in82 mm
|
|
Jaw Stroke
|
N/A
0.299 in7.6 mm
|
N/A
0.335 in8.5 mm
|
|
Actuator Stroke
|
N/A
0.709 in18 mm
|
N/A
0.787 in20 mm
|
|
Max. Draw Tube Force
|
N/A
8,540 lbs38 kN
|
N/A
11,240 lbs50 kN
|
|
Max. Clamp Force
|
N/A
21,130 lbs94 kN
|
N/A
26,970 lbs120 kN
|
|
Max. Speed2
|
N/A
5,000 rpm
|
N/A
4,500 rpm
|
|
Chuck Weight3
|
N/A
52 lb23.6 kg
|
N/A
88.2 lb40 kg
|
|
Moment of Inertia4
|
N/A
13.5 lb-ft²0.57 kg-m²
|
N/A
31.09 lb-ft²1.31 kg-m²
|

